This Article describes how to build (and work with) a Certificate
structure to have an own CA that works for EAP-TLS Client / Server
Authentication or PEAP. We also cover the use on the Client side.
Because there are multiple ways we do not cover the Access Point setup (too simple just the IP-Address of
your Radius server and the shared secret and your Wireless setup) nor the
Radius server (need IP-Addresses of the AP’s as NAS-Client and the shared secret
and include the Certificates to the right Places).For this please search the
Manuals of your Vendor.
The goal is to make the whole Certificate thing easy for you and rapid to
use.
At the beginning you’ll have to make the hardest Choice in your Life. If
you spoil it you can have lot’s of additional Work: Choose
a PKI to work with.
You may use what Vendors like Microsoft have build
for you. If your Infrastructure is build with Microsoft servers and you plan a
big permanent Rollout, you better use the PKI Microsoft provides (not covered
in this Article).
If you search for an alternative this Article shall be useful for you.
For generating the Certs in this Article we
use a PKI called XCA for various reasons:
·
It is supported under Linux and Windows!
·
It’s OpenSource and free to
use
·
It has everything you need (without the http server
for your CRL)
·
It has a GUI so you don’t need to know cryptic openssl commands
·
You don’t need to have a Microsoft Server (with IIS
and CA)
·
For TLS you don’t need the Client to issue a
Certificate Request, then the CA signs it and sends it back. You can generate
the Cert on the PKI, send it to the Client. He just clicks it for include and
that’s all.
·
It’s fast to use (GUI),
however it becomes a bit unhandy for generating large numbers of Certs. So search for something other on > 100 Certs.
Download XCA via http://sourceforge.net/projects/xca
The Certs we will generate with XCA will have
the same Credentials set and support the same attribute types as used when
using the Microsoft CA. By doing so this works also fine as Certstructure
for Rolling out EAP-TLS (or PEAP) for WiFi Clients.
Now let’s do something practical. Download XCA and we start.
After installing XCA you need to add attributes that Microsoft is using
in their Certs.
Under the windows environment search for “oids.txt” (try c:\Programm
Files\xca\oids.txt) and add the two Lines show in red below to the File. You must have these OIDs
in your Certs at the right Places or the native
Windows Client will not work!
# Do not edit this file, add
your own OIDs in /etc/xca/oids.txt
# or $HOME/xca
# OID short name long name
1.3.6.1.4.1.311.20.2: dom: Domain Controller
1.3.6.1.4.1.311.21.1: MsCaV:
1.3.6.1.4.1.311.20.2.3: msUPN: Microsoft
Universal Principal Name
1.3.6.1.4.1.311.10.3.4.1:msEFSFR: Microsoft EFS File Recovery
1.3.6.1.5.5.7.3.1: serverAuth: Microsoft Server
1.3.6.1.5.5.7.3.2: clientAuth: Microsoft Client
1.3.6.1.5.5.8.2.2: iKEIntermediate: IP security end entity
1.3.6.1.4.1.311.20.2.2: msSmartcardLogin: Smart Card Logon
2.5.4.44: generationQualifier: generation Qualifier
2.5.4.45: x500UniqueIdentifier:
x500 Unique Identifier
2.5.4.65: pseudonym: pseudonym
This is a link to the File to write.
Start XCA.
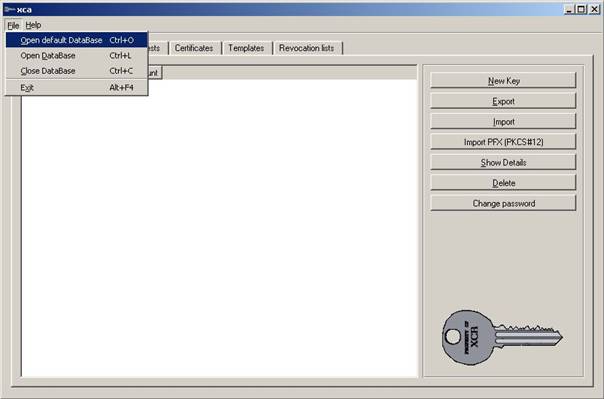
Open the default DB. Note that is has a Password but is NOT encrypted
with it. So make sure nobody can get access to it. EVER!
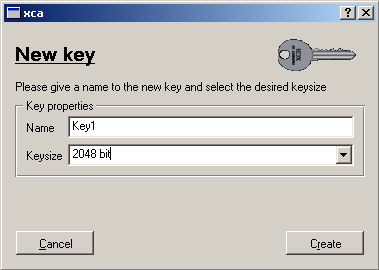
You can generate Keys in advance or when you generate the Certs.
Make sure you don’t go below 2048Bits in your Security.
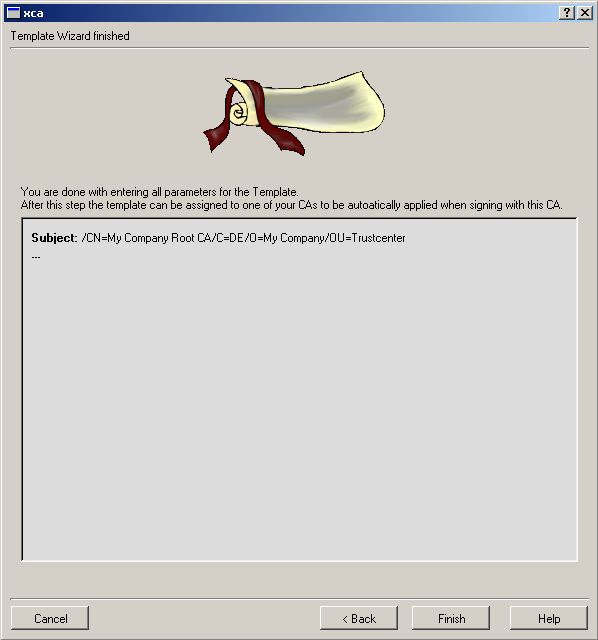
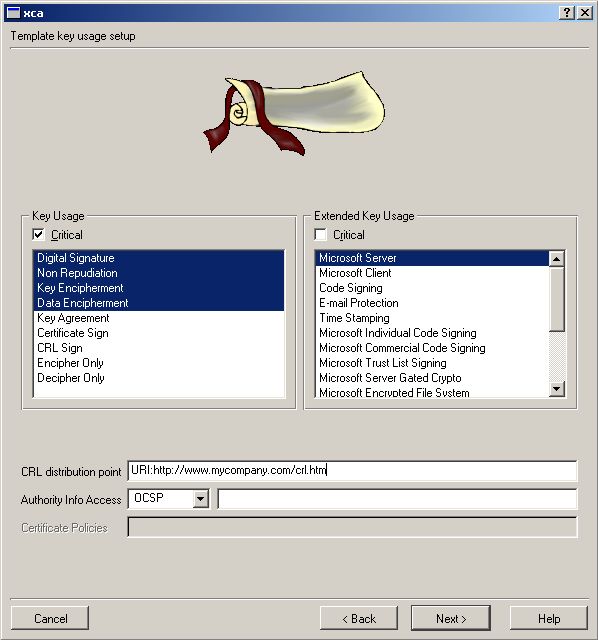
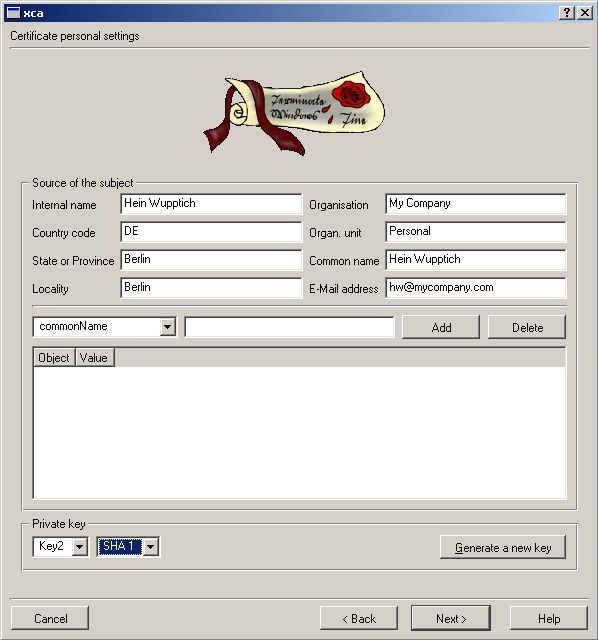
We now make a Template for your own
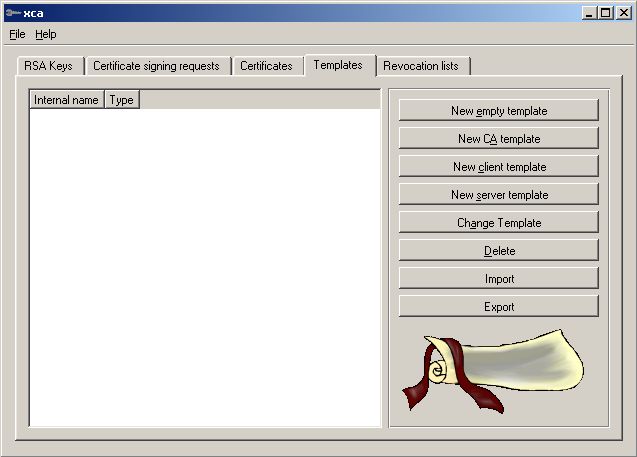
Go to Templates ->
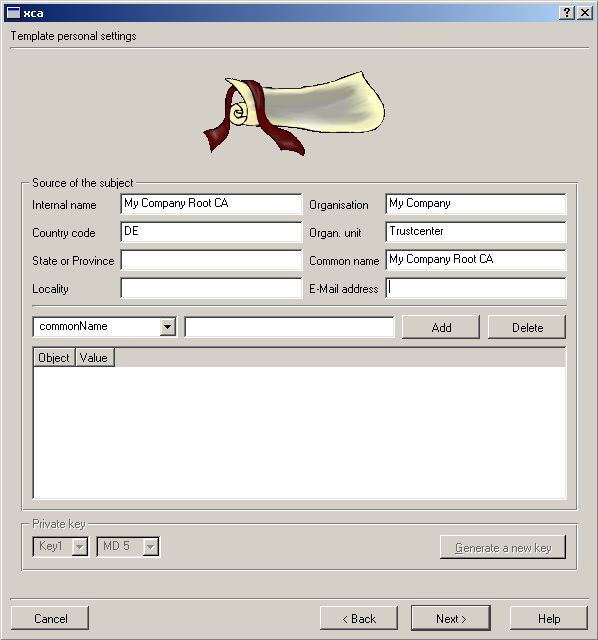
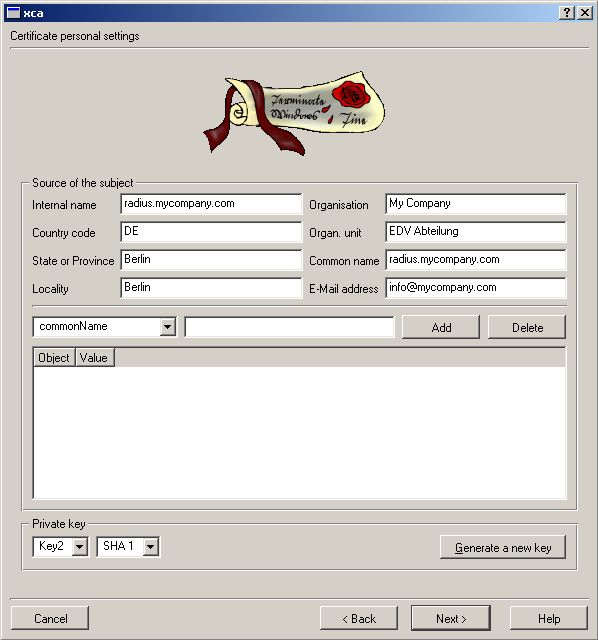
Make sure your Organisation name is the same in all Certs you’ll use.
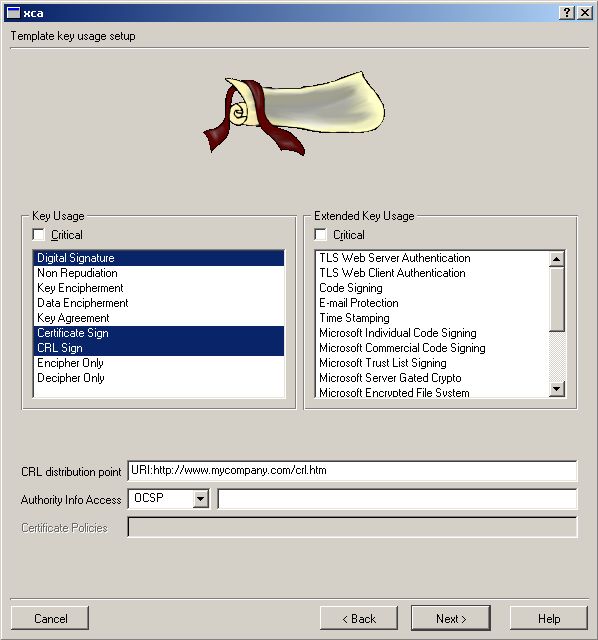
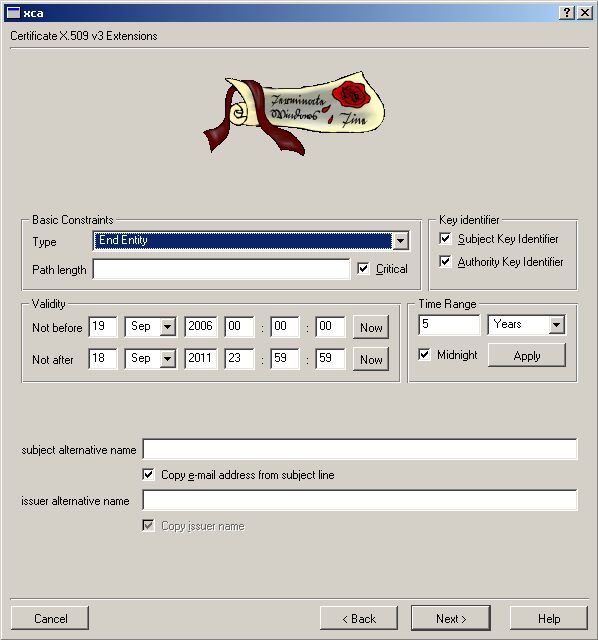
Make sure the location for your Certification Revocation List is
reachable for the Radius server and the Clients.
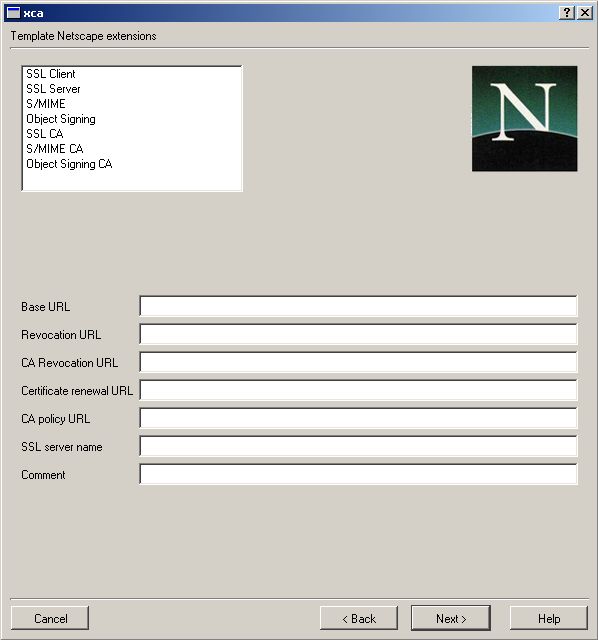
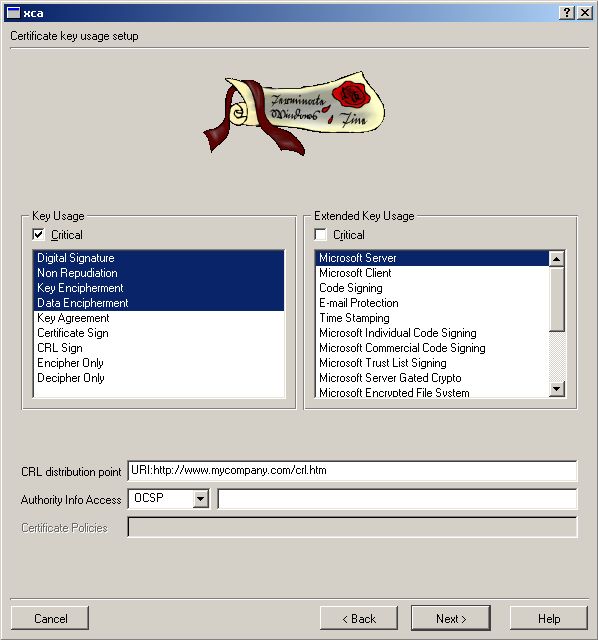
We don’t need ANY Netscape Stuff in our ENTIRE Environment.
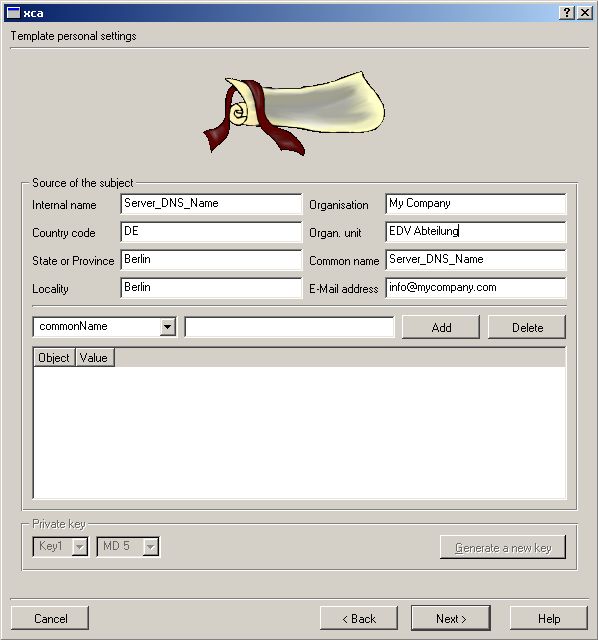
We now make a Template for your own Server Cert. If you want to avoid
most of the typing work just import the following File.
Note that all other things shall similar to your
Templates -> New server template
.
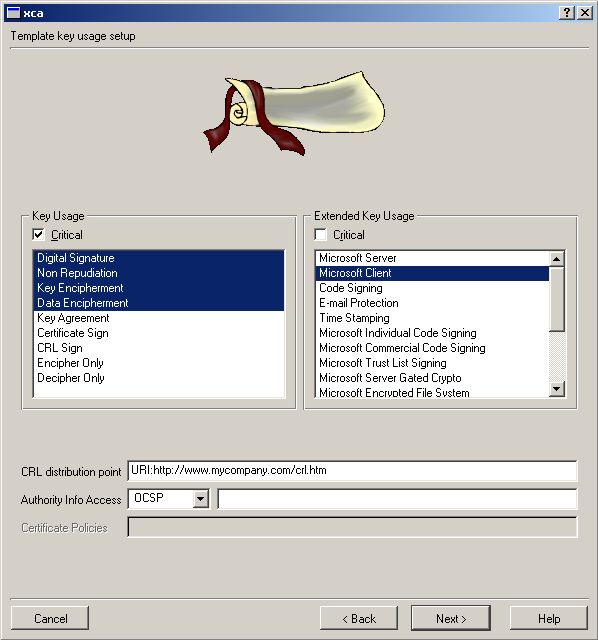
This Section is only needed if you plan to use EAP-TLS. For PEAP only
you can skip this Section.
We now make a Template for your own Client Cert. If you want to avoid
most of the typing work just import the following File.
Note that all other things shall similar to your
Go to Templates -> New client template
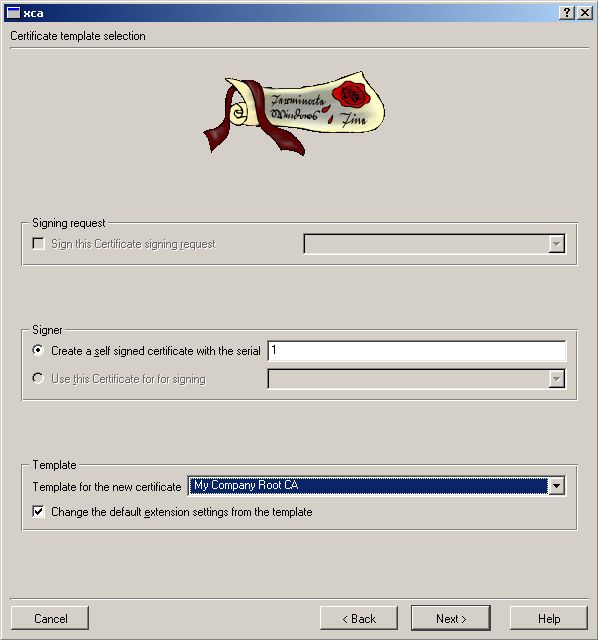
Now we need to generate the Certs we will be
using. Go to Certificates -> New Certificate
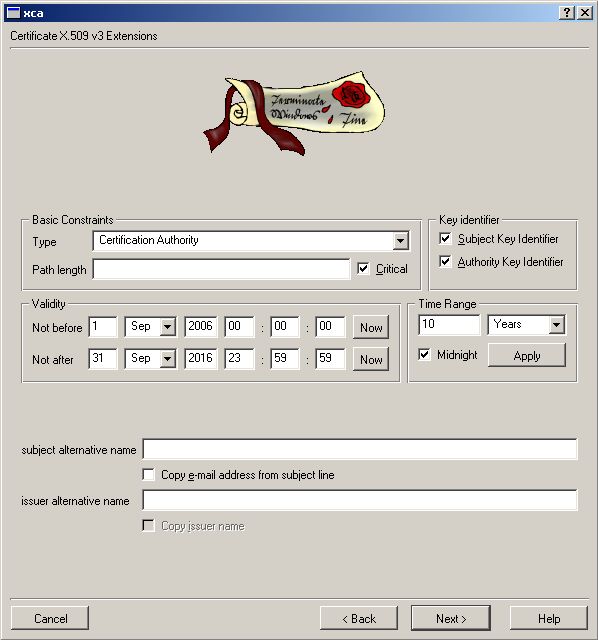
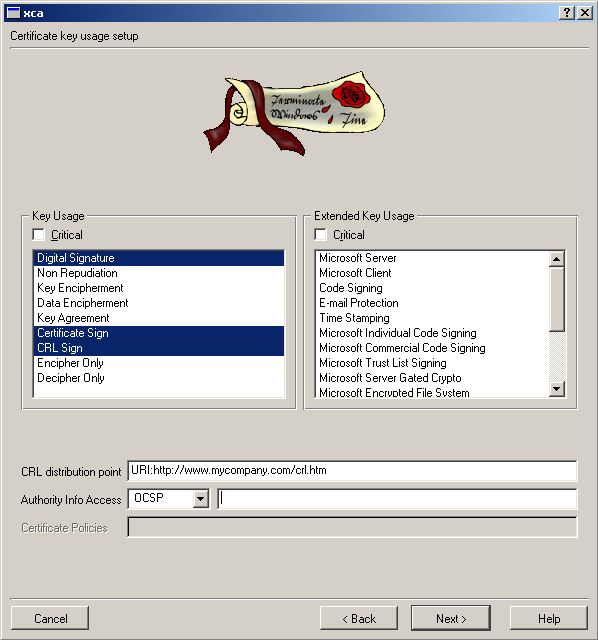
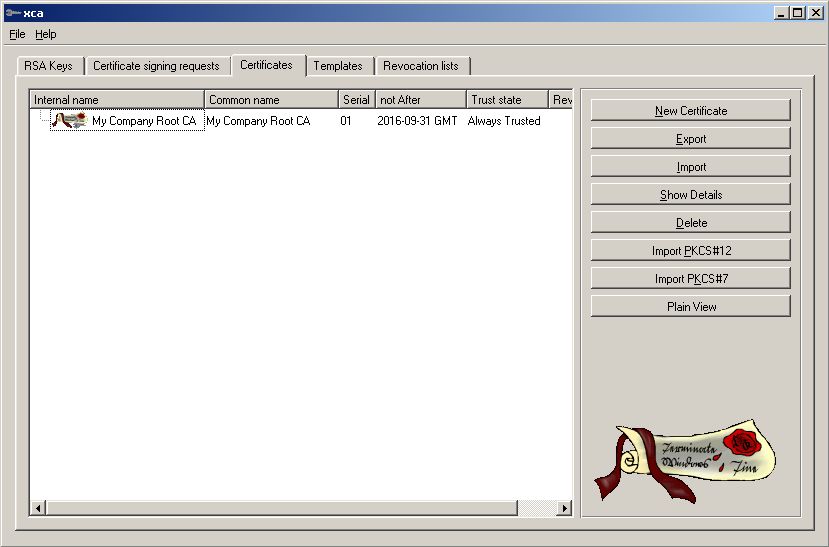
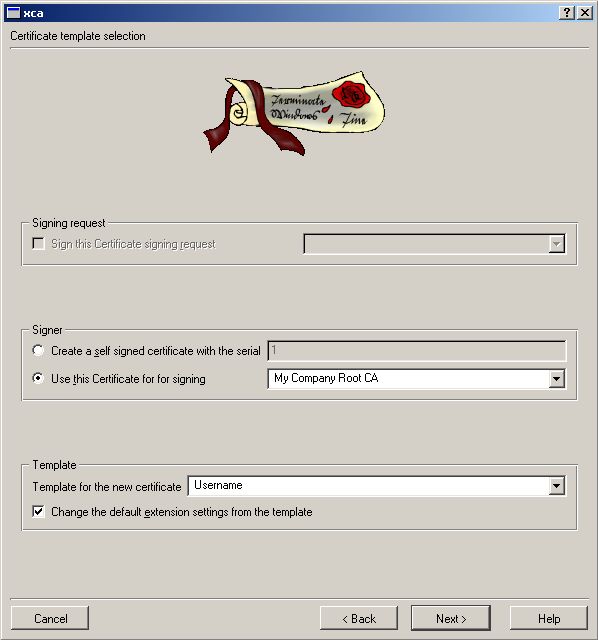
First we need the Root CA for all things we will be sign.


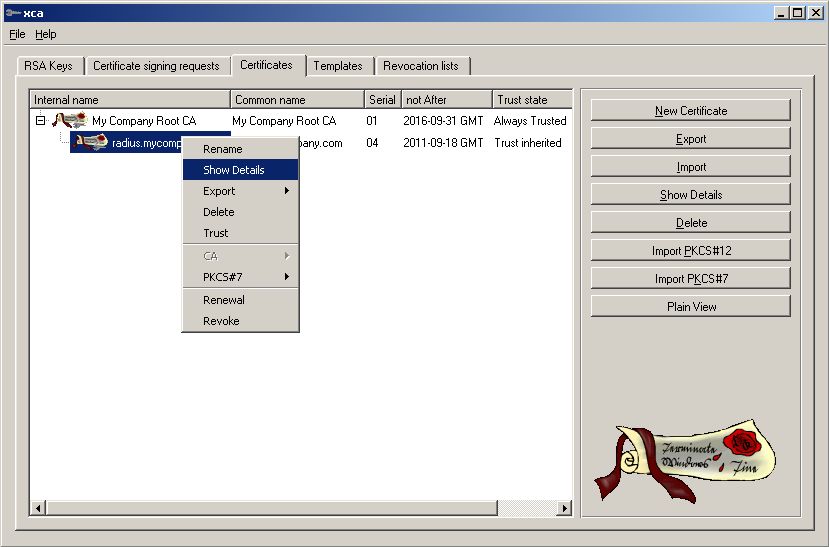
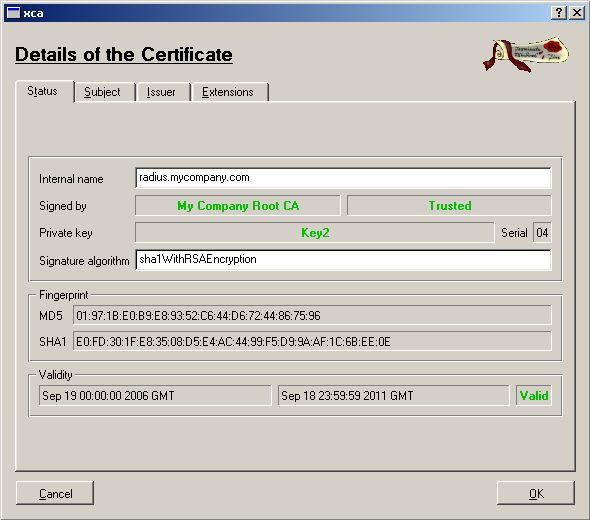
Now we need the Server Certificate. See below how to do it. Go to
Certificates -> New Certificate
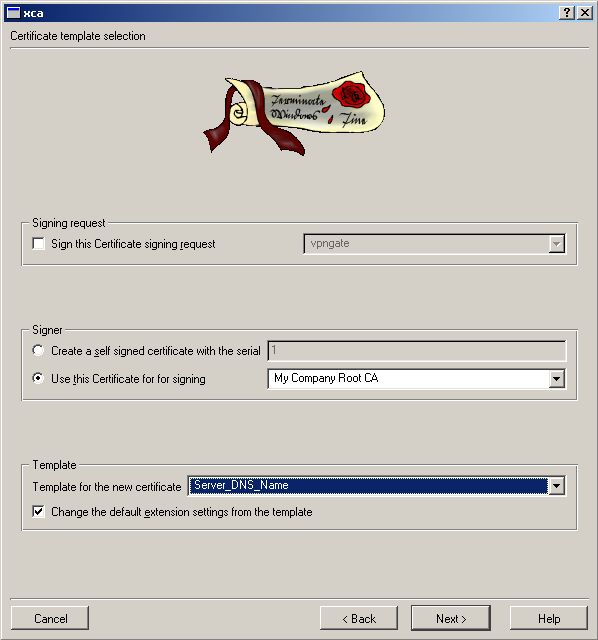
Make sure Internal/Common Name match the DNS-entry of your Server.

For TLS we need Client Certs. They are now
generated. SKIP this section if
you’re only doing PEAP or TTLS.
Now we do the Client Cert. Go to Certificates -> New Certificate


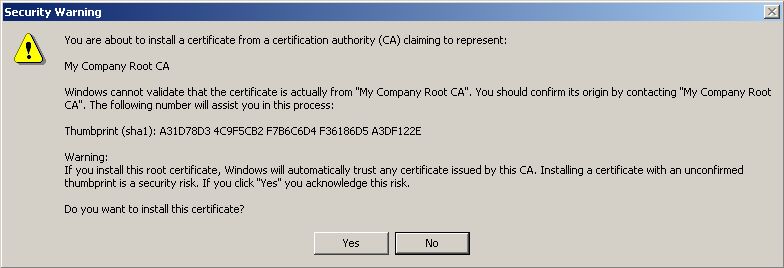
We need to export the Public Part of our Root CA (for PEAP and TTLS)
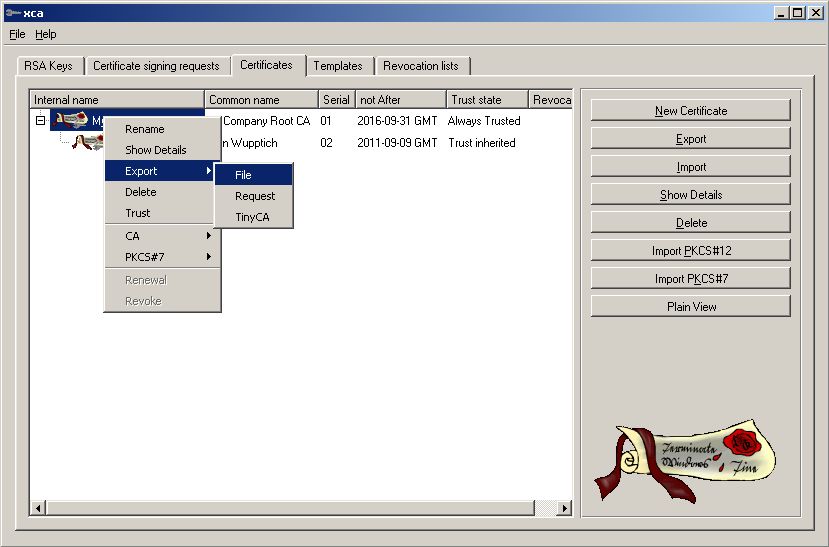

Save this and give it to your Clients for import.
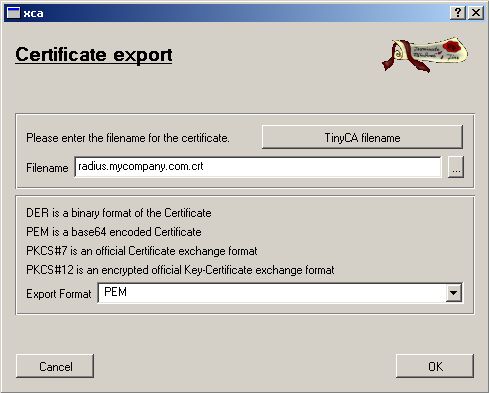
We need to export the generated Server Cert to your Radius Server (for
TLS, TTLS and PEAP)
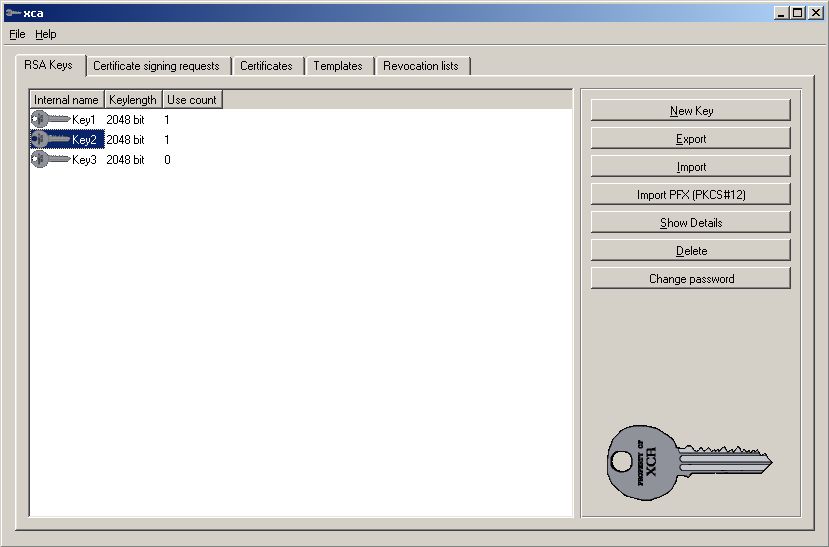
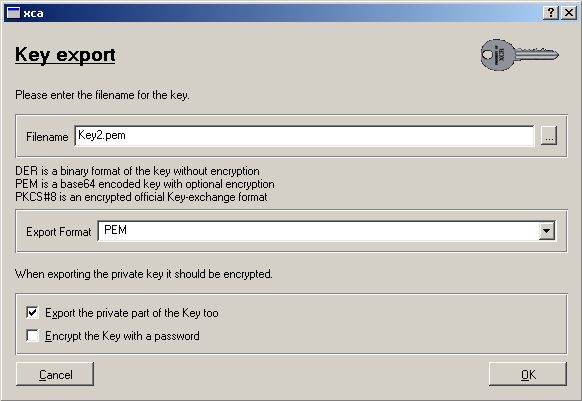
You need the private part as well but how to export the private Key?
It tells you how the Private Key is named so “Key2” is the private Key
to export.
Both Parts (public/private) and the public CA part shall be used to
import in your Radius server.
Sometimes you’ll have to export other structures such as PKCS#12 but XCA
may do this as well for you.
Make sure the Radius server can have access to your CRL hosted on your Webserver.
We need to export the Client Cert (for TLS only)
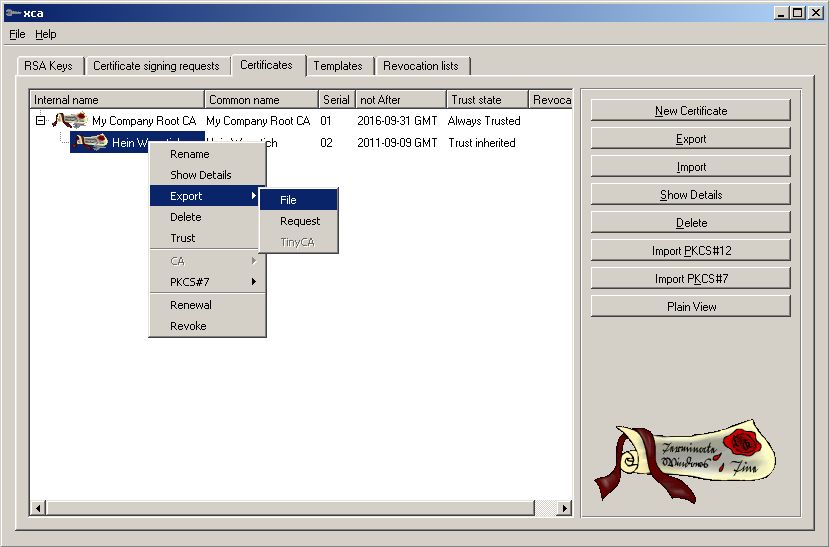
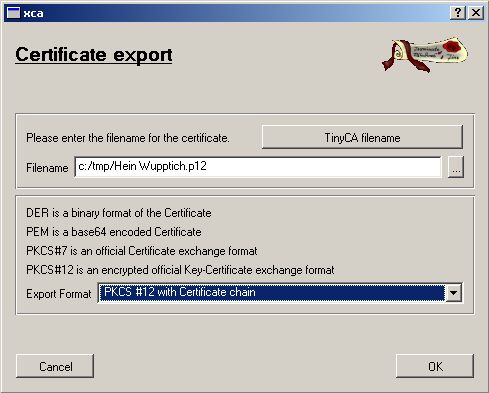
Make shure to use PKCS#12 with Cert Chain
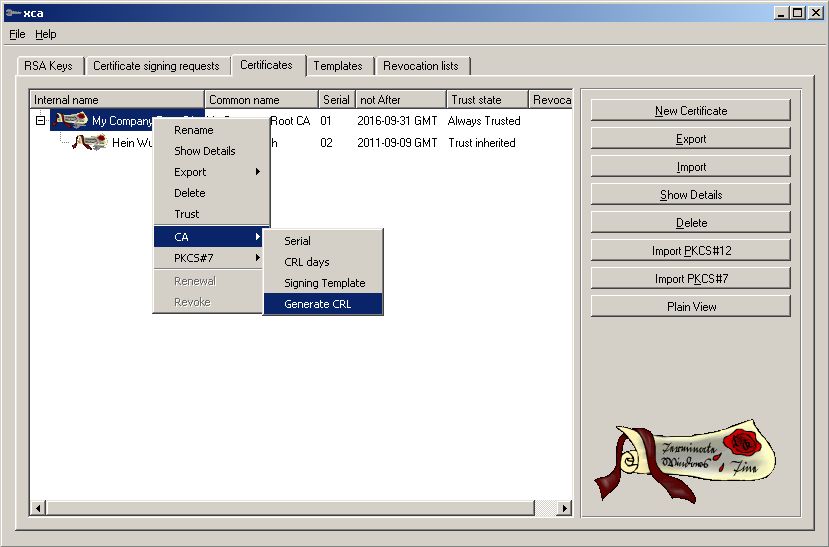
Now build a Certficate Revocation List. This
have to be loaded after every change to your HTTP server.
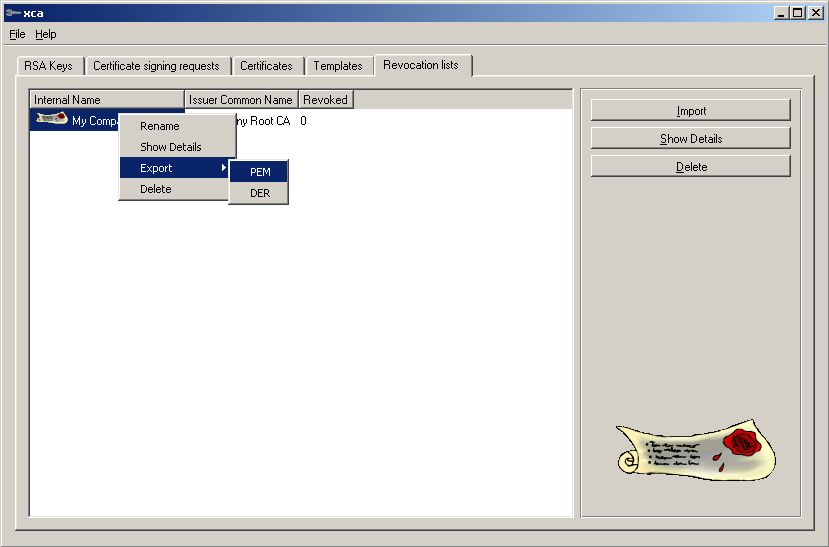
Export the CRL file and put it on your Webserver
(needs to be refreshed every time you revoke a Cert)
This is the whole Cert Stuff you need to know. Sounds big but this if
only due to the many screencaptures we’ve provided.
Mostly it’s only clicking ahead if you know how to.
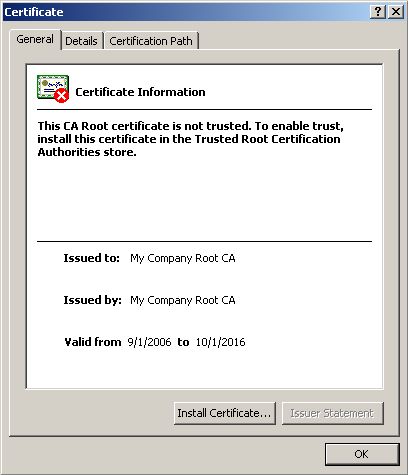
We now show the Microsoft Client Side but make sure you’ve installed and
setup the Radius Server before.
The First Setup is for PEAP (and TTLS).
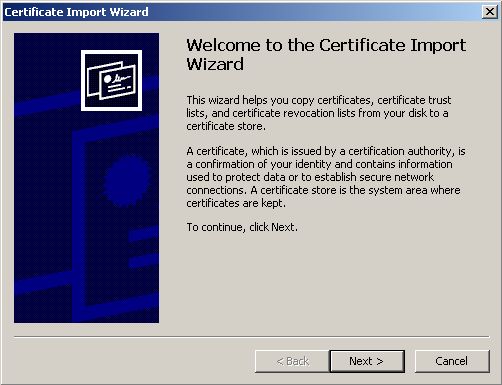
A Client need to Double-Klick on your

Now we setup your Wireless connection. Activate your Wireless card and
go to Properties.
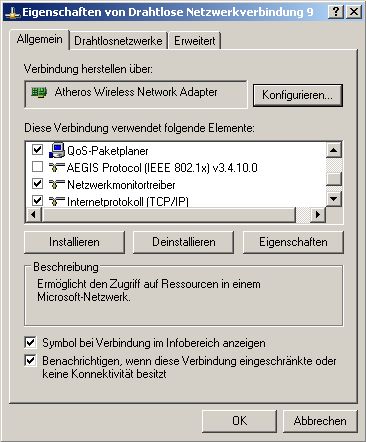
Make sure you’ve disabled a third party 802.1x Supplicant like AEGIS.

Add your Network if not already done or edit his Properties
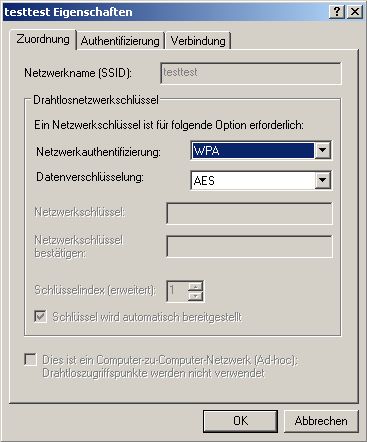
WPA 802.1x and WPA2 802.1x are used with “WPA”
Hope your Network can support strong encryption with AES.
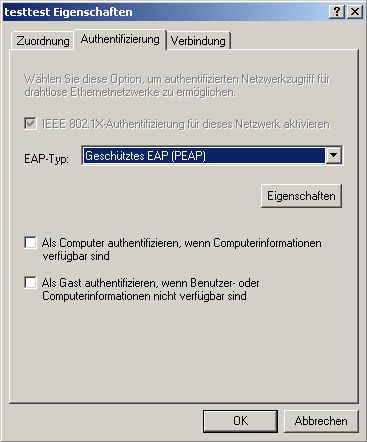
Choose PEAP and go to Properties.
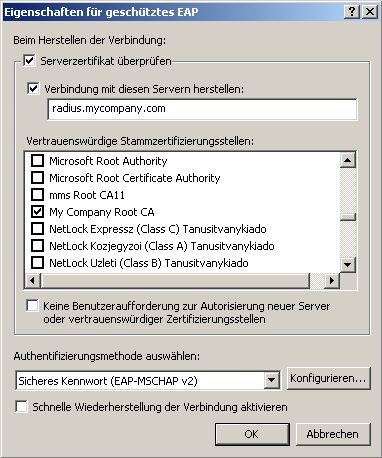
Make sure you check the
Certificate. Select your own
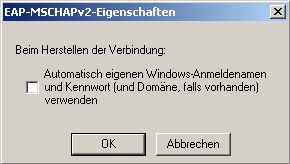
If you want to use own Usernames / Password uncheck this.
DONE!
Now we do the TLS Setup on the Client.
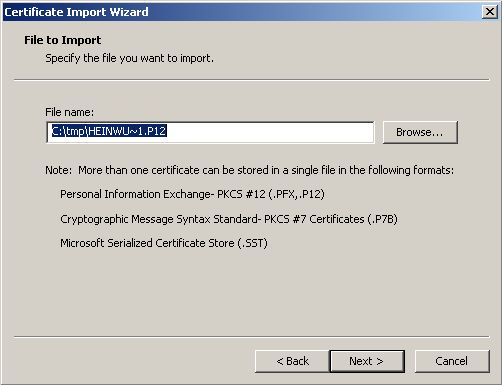
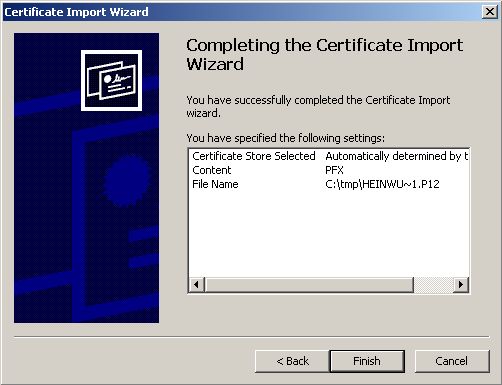
A Client need to Double-Klick on his own Cert
from the CA like “Hein Wupptich.p12”. It will import the Client AND

Now we setup your Wireless connection. Activate your Wireless card and
go to Properties.

Make sure you’ve disabled a third party 802.1x Supplicant like AEGIS.
Add your Network if not already done or edit his Properties
WPA 802.1x and WPA2 802.1x are used with “WPA”
Hope your Network can support strong encryption with AES.
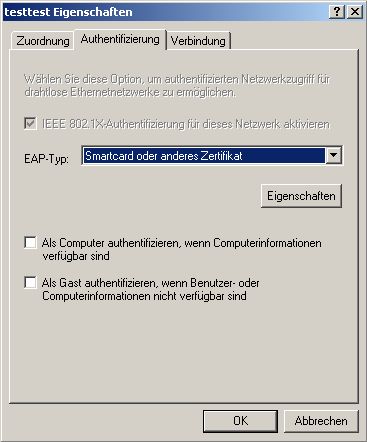
Choose “Smartcard or other Certs” and go to
Properties.
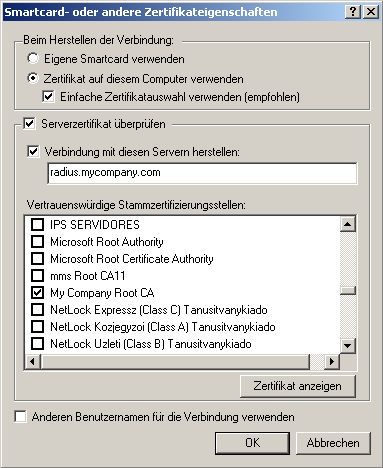
Make sure you check the
Certificate. Select your own
If you need the Files generated for Help. Look here:
The XCA-Database. The Password is “testtest”
The modified OID File
Server Private Key no Password
Client Cert no Password
Hint: If something doesn’t work and you are sure it’s not the attributes
you use in a Cert check
the Clock settings on both sides (Server/Client) and make sure ALL Certs
are in the Time range. If your
This Article is Copyrighted 2006 by mms communication AG. All Rights
Reserved.